Envi Space Mounting Instructions
The Envi Space waste sorting system is easy to install. A mounting instruction and a paper template for screw positions are included in the package.
Tools needed
- A manual screwdriver
- Tape measure or ruler
- Preferably an awl or some tool with a sharp end, to make a mark for the screws.
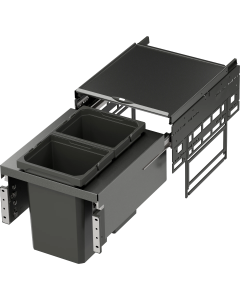
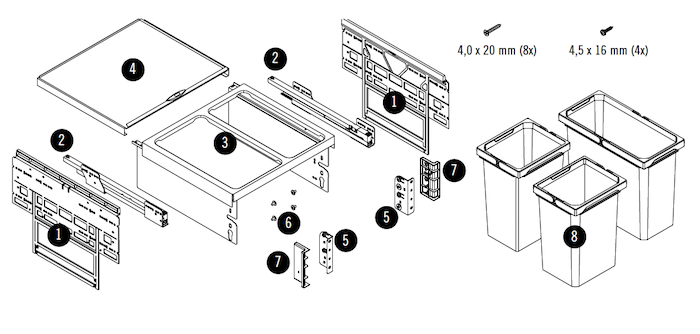
What's included in the package
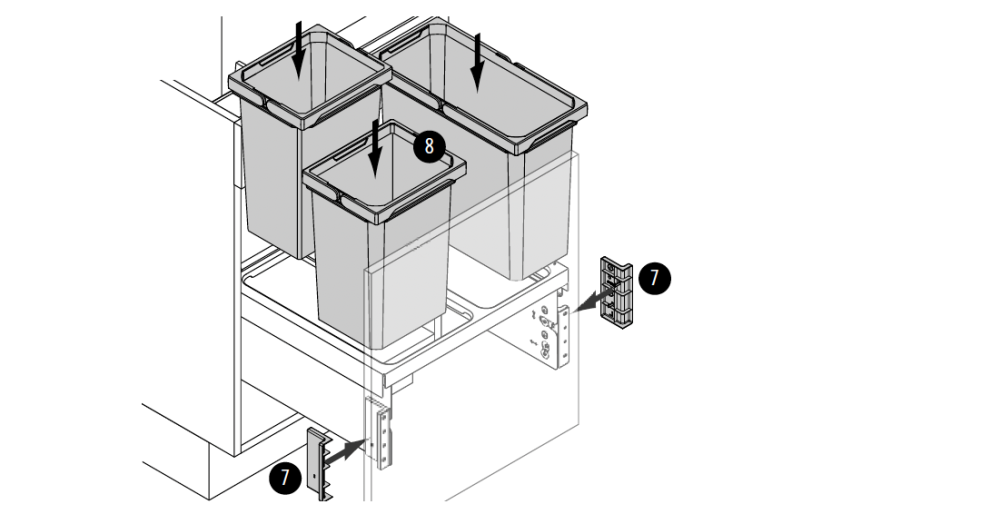
- Side holders
- Rales that let the full waste been slide out
- The frame that holds the buckets in place
- Top cover
- Brackets that connect the cabinet door with the wastebin frame
- Mounting Screws
- Covers for the brackets
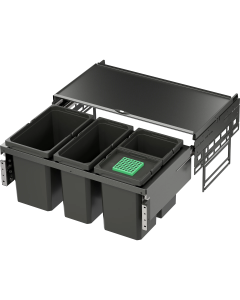
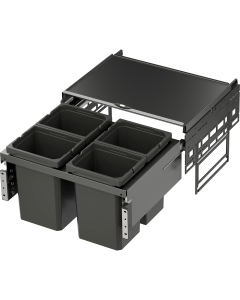
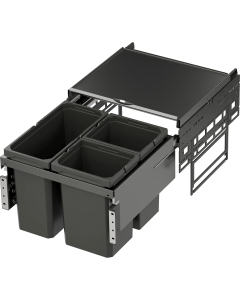
- Buckets (amounts and size depend on which model you ordered)
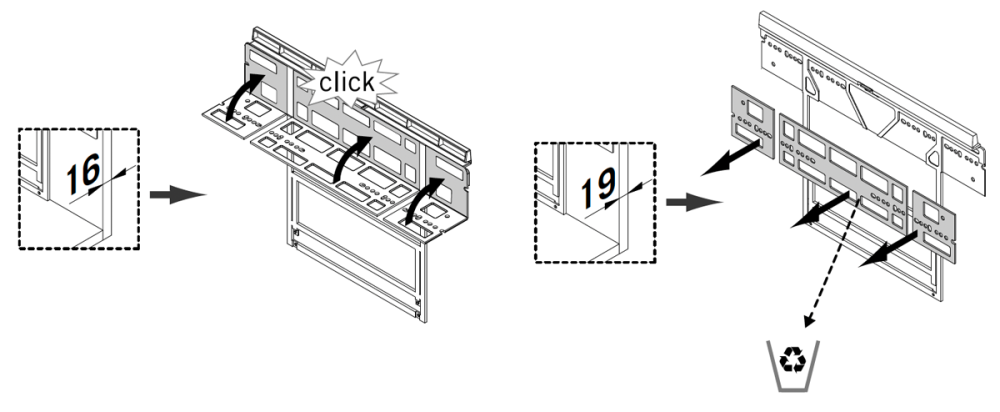
Step 1 - Check cabinet thickness
Standard cabinet side thickness is 16 mm or 19 mm.
- Measure the cabinet side thickness
- For 16 mm: Fold the adjustment tab upwards until it clicks
- For 19 mm: Remove the foldable part completely
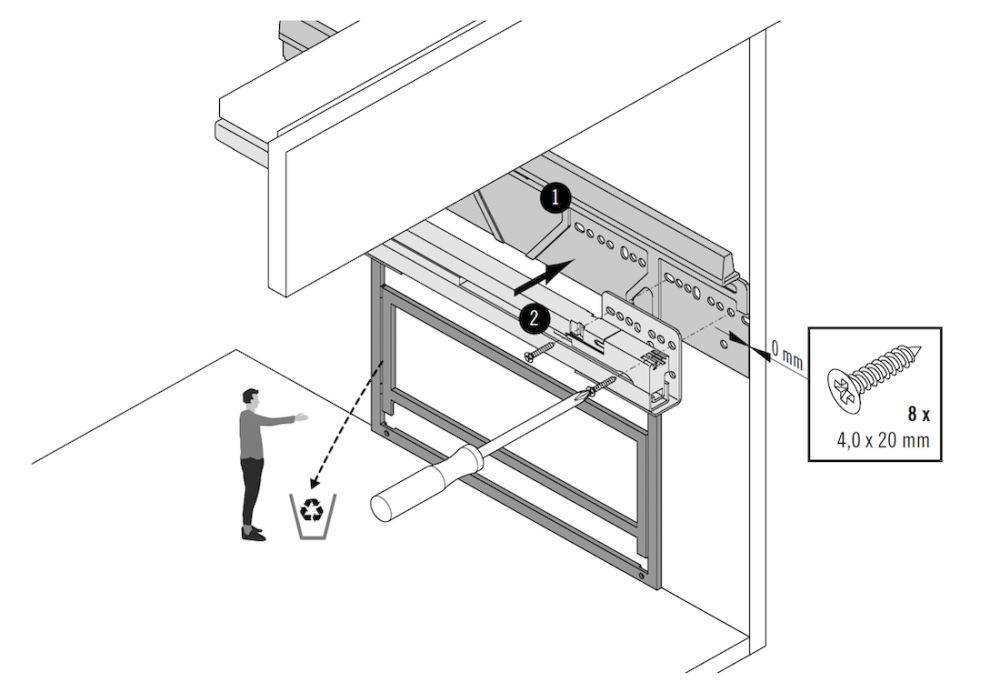
Step 2 - Install side holders, rails, and top cover
- Place the side holders at the inner edges of the cabinet
- Fix the side holders and rails using the included screws
- Slide the frame into the rails
- Place the top cover on the side holders
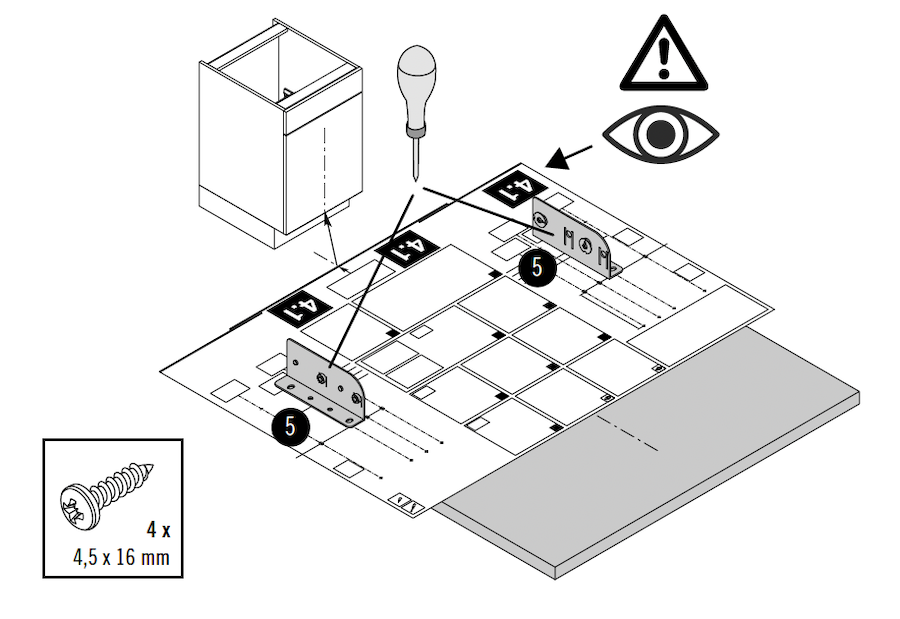
Step 3 - Install door brackets on cabinet door
- Unfold the paper template included in the package
- Adjust the template for 16 mm or 19 mm cabinet thickness (cut if needed)
- Place the template at the bottom on the inside of the cabinet door
- Mark the screw positions
- Remove the template
- Position the brackets on the marked points
- Fix the brackets with screws
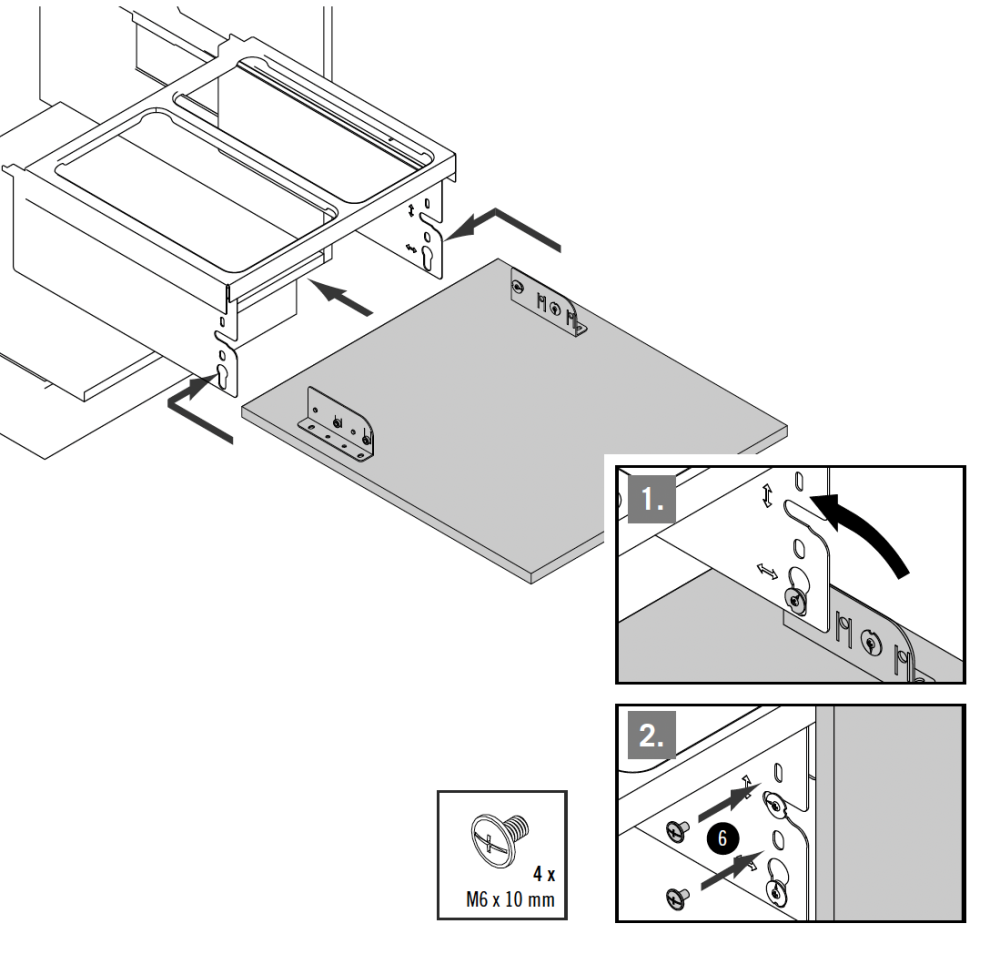
Step 4 - Attach cabinet door to frame
- Connect the brackets to the frame
- Close the cabinet door
- Tighten with the M6 screws to secure the door
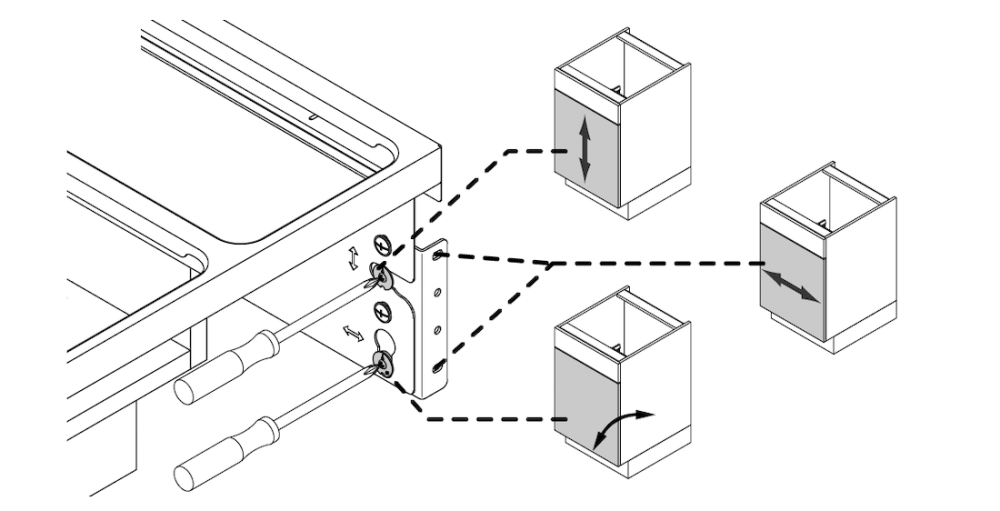
Step 5 - Adjust the cabinet door
Use the adjustment screws to align the door with the cabinet
Step 5 - Insert buckets and covers
- Place the buckets into the frame
- Attach the bracket covers